| 1. | Click on the Options button  on the Toolbar, or click Tools on the Menu bar and select Options. on the Toolbar, or click Tools on the Menu bar and select Options. |
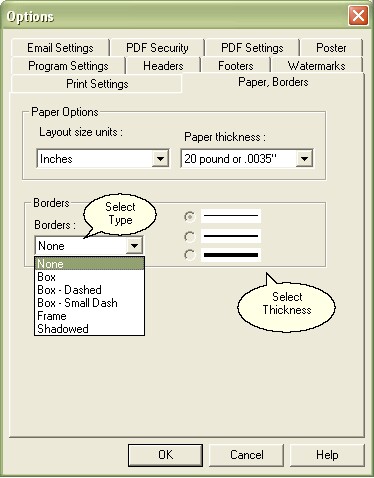
| 2. | In the Options dialog box click on the Paper, Borders tab. |
| 3. | In the Borders box you can select the type of border you want and the thickness of the lines. |
| 4. | Click OK. A border will now be placed around your print job. |

***NEW*** ClickBook now has diagnostic borders to see if the pages are aligned properly.
Note: Borders are not printed on posters.